This document is a step-by-step guide explaining the steps required to create Employee Segments in ChangeEngine.
Creating Employee Segments in ChangeEngine is an important part of effective internal communication. By segmenting employees into distinct groups, organizations can ensure that the right people get the right message at the right time. This helps to make sure that messages are tailored and relevant to their intended audience, resulting in better responses and improved engagement.
In this step-by-step guide, I'll walk you through the process of creating Employee Segments in ChangeEngine. Our platform gives you some really powerful tools for creating dynamic segments, so let's hop in and take a look around.
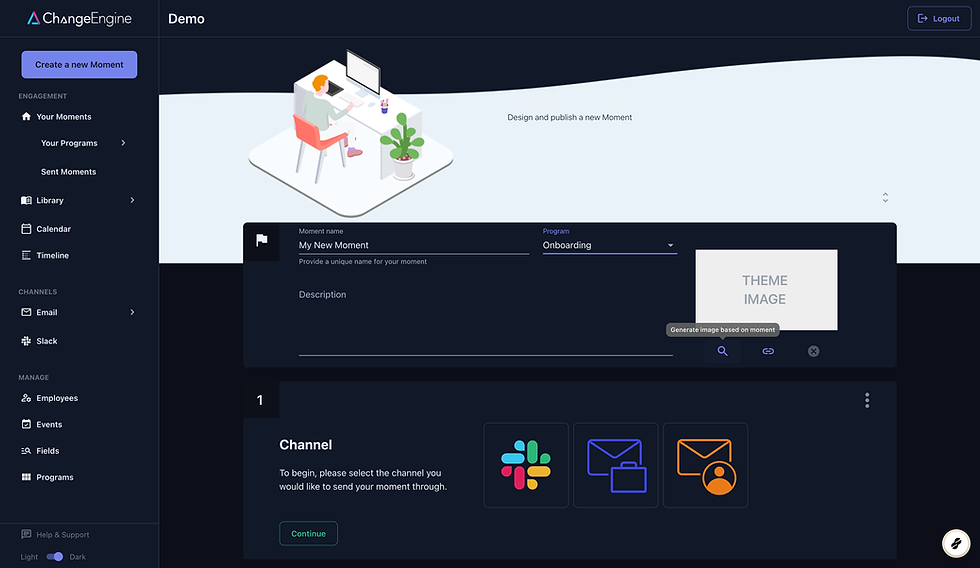
Step 1. Create or Edit a Moment
Employee Segments get managed from the Moment create or edit form. Navigate to the Moment that you want to crate an Employee Segment for, or click "Create a New Moment" in the left menu.
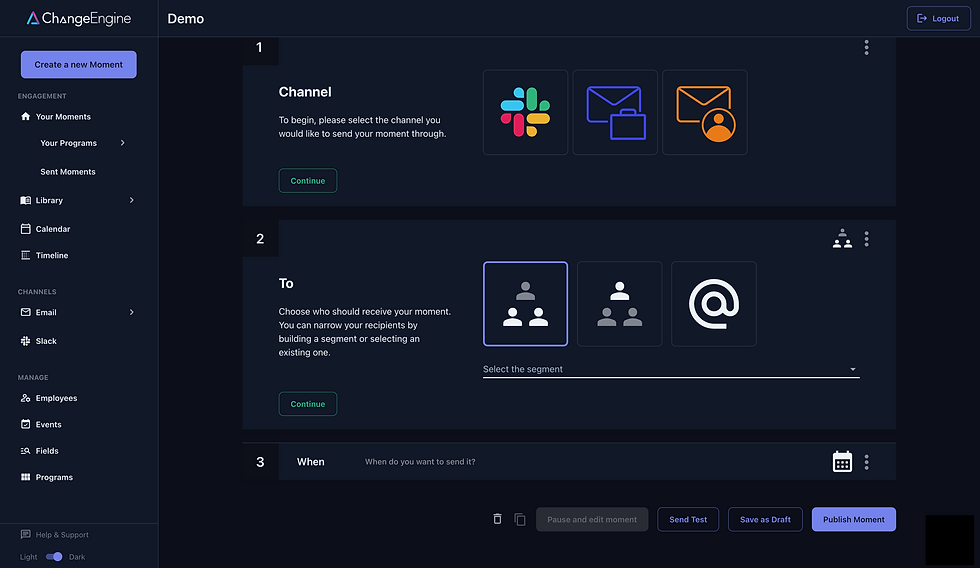
Step 2. Select a Segment Type
There are 3 types of segments that you can use in ChangeEngine: employees of a segment, managers of the segment's employees, and direct messages from a segment.
First, let's take a look at Employees of a Segment.
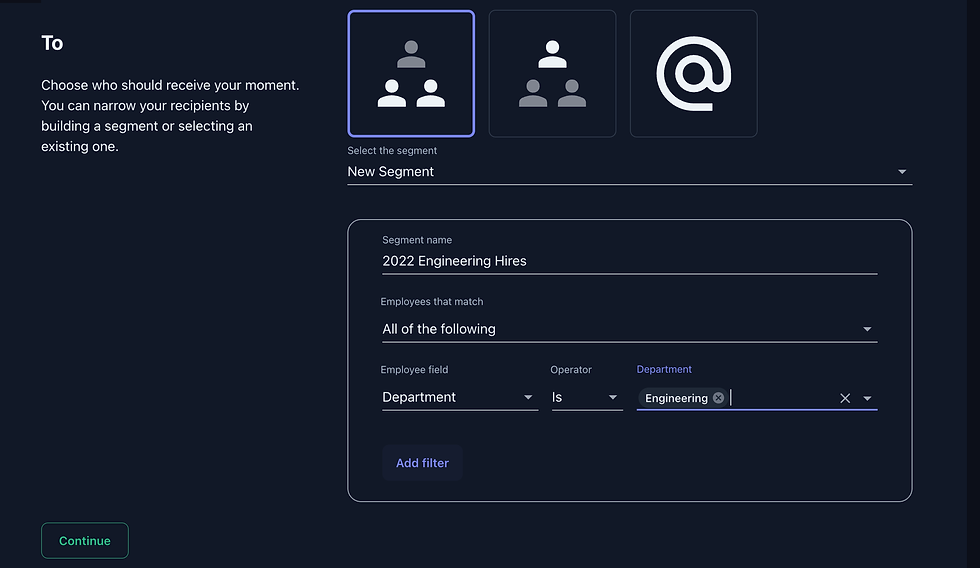
Type 1: Employee Segment
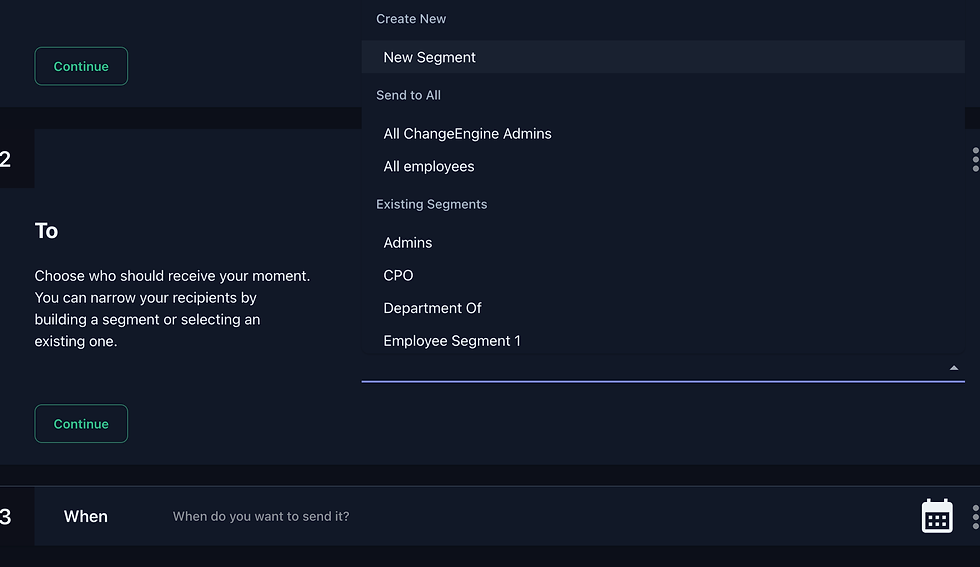
ChangeEngine will save all previously created Employee Segments so that it's easy to quickly access and reuse them. It also ships with two default segments, all employees and all ChangeEngine admins.
Click on the "Create Segment" button in the select options so that we can explore the configuration options.
Step 3. Enter a Segment Name
Go ahead and give your segment a name. This is useful for keeping track of the segments that you've created, and makes it easy to find them again later on.
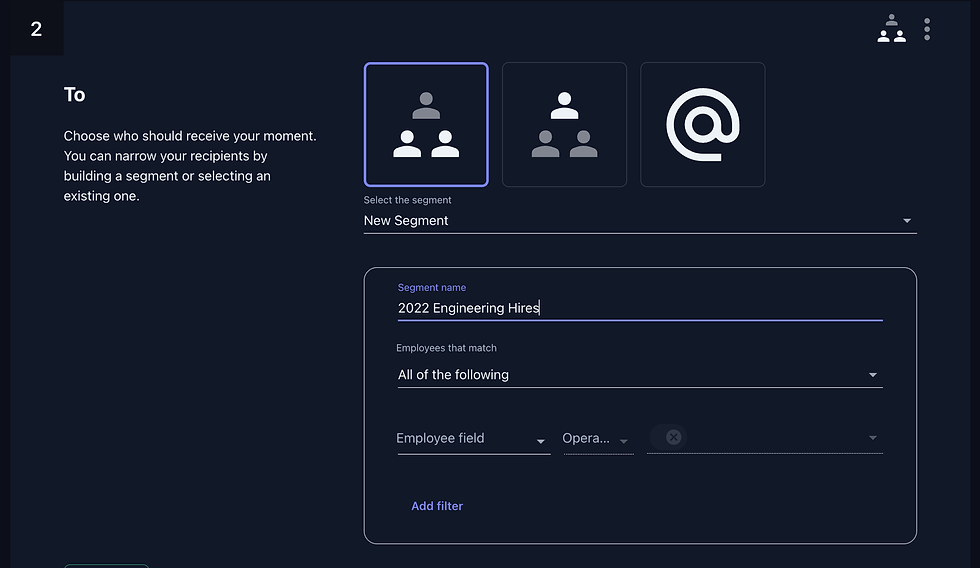
Step 4. Configure a Filter
Now we can create our first filter, which allows us to identify employees based on a criteria.
You can create a filter using any field on the employee record, and ChangeEngine will validate the relevant predicates and values for that field type.
The pattern goes as follow: FIELD -> PREDICATE -> VALUE(S)
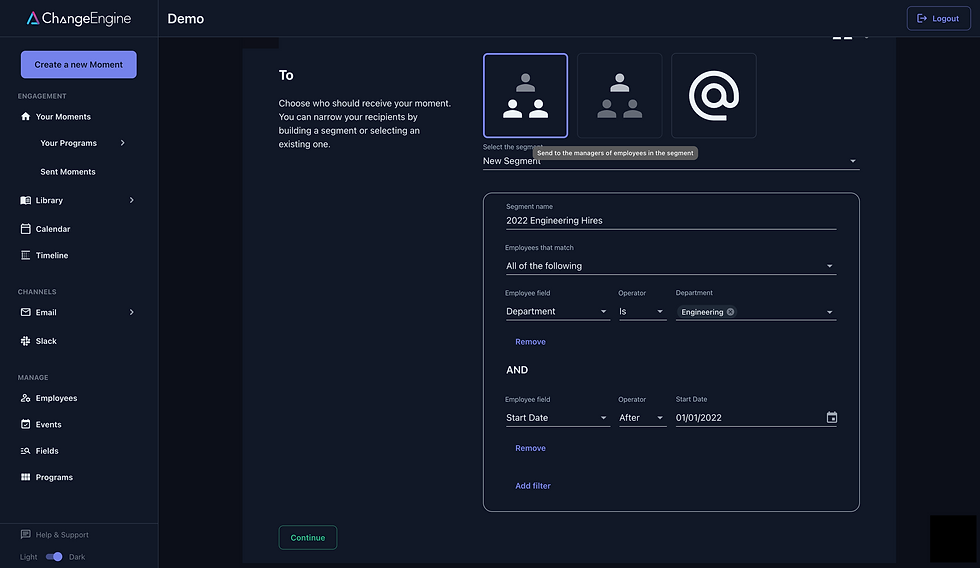
Step 5. Configure an Additional Filter (optional)
If you want to create a more complex segment, specify additional filters based on multiple fields. To add an additional filter, simply click the "Add filter" button and enter your new conditions. You can use any field on the employee record as well.
Additionally, know that you can specify your filters as working together or separately using the "Employees that match" option.
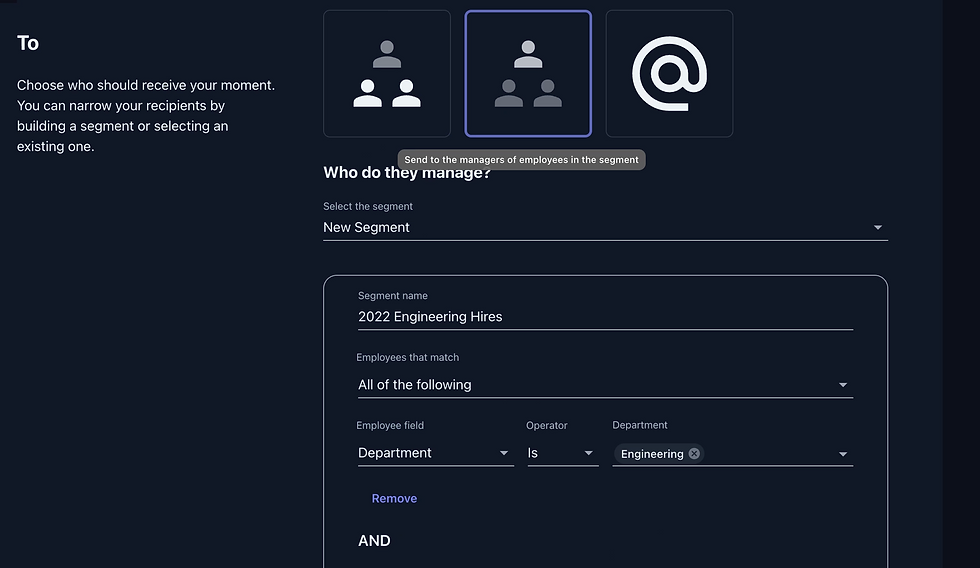
Type 2: Manager Segment
Manager Segments allow you to send Moments to managers of the employees that are in a particular segment. Pretty cool, right?
To create one, simply click on the "Manager Segments" option from the segment audience options and configure your criteria as you did for Employee Segment.
As with employee segments, ChangeEngine allows you to specify multiple filters for manager segments if you want more complex filtering capabilities.
Type 3: Direct Messages
Direct messages allow you to notify specific people based on the employees in the segment. Note that this type is only available when using the Slack or Work Email channel.
For example, let's imagine that 5 days before someone is promoted to a manager position, you want to send your CEO and CTO an email letting them know. A direct message would allow you you to specifically set your CEO and CTO as the recipients of the Moment.

Conclusion
In this step-by-step guide, you learned how to use the Employee Segment feature in ChangeEngine to create and edit custom segments that help you target specific employees with the right messages at the right time. ChangeEngine makes it easy to build dynamic segments that help you engage with your employees and customers more effectively.
Feel free to check out our other guides and tutorials, as well as reach out if you have any question!
Comments