How to Create an Ad in Jebel Ads Manager
As a business participating in a Jebel community, creating ads is a powerful way to connect with the community and promote your products and services. In this walkthrough, we'll demonstrate how to create an ad for your business using Jebel's Ads Manager.
Navigating to the Advertising Dashboard
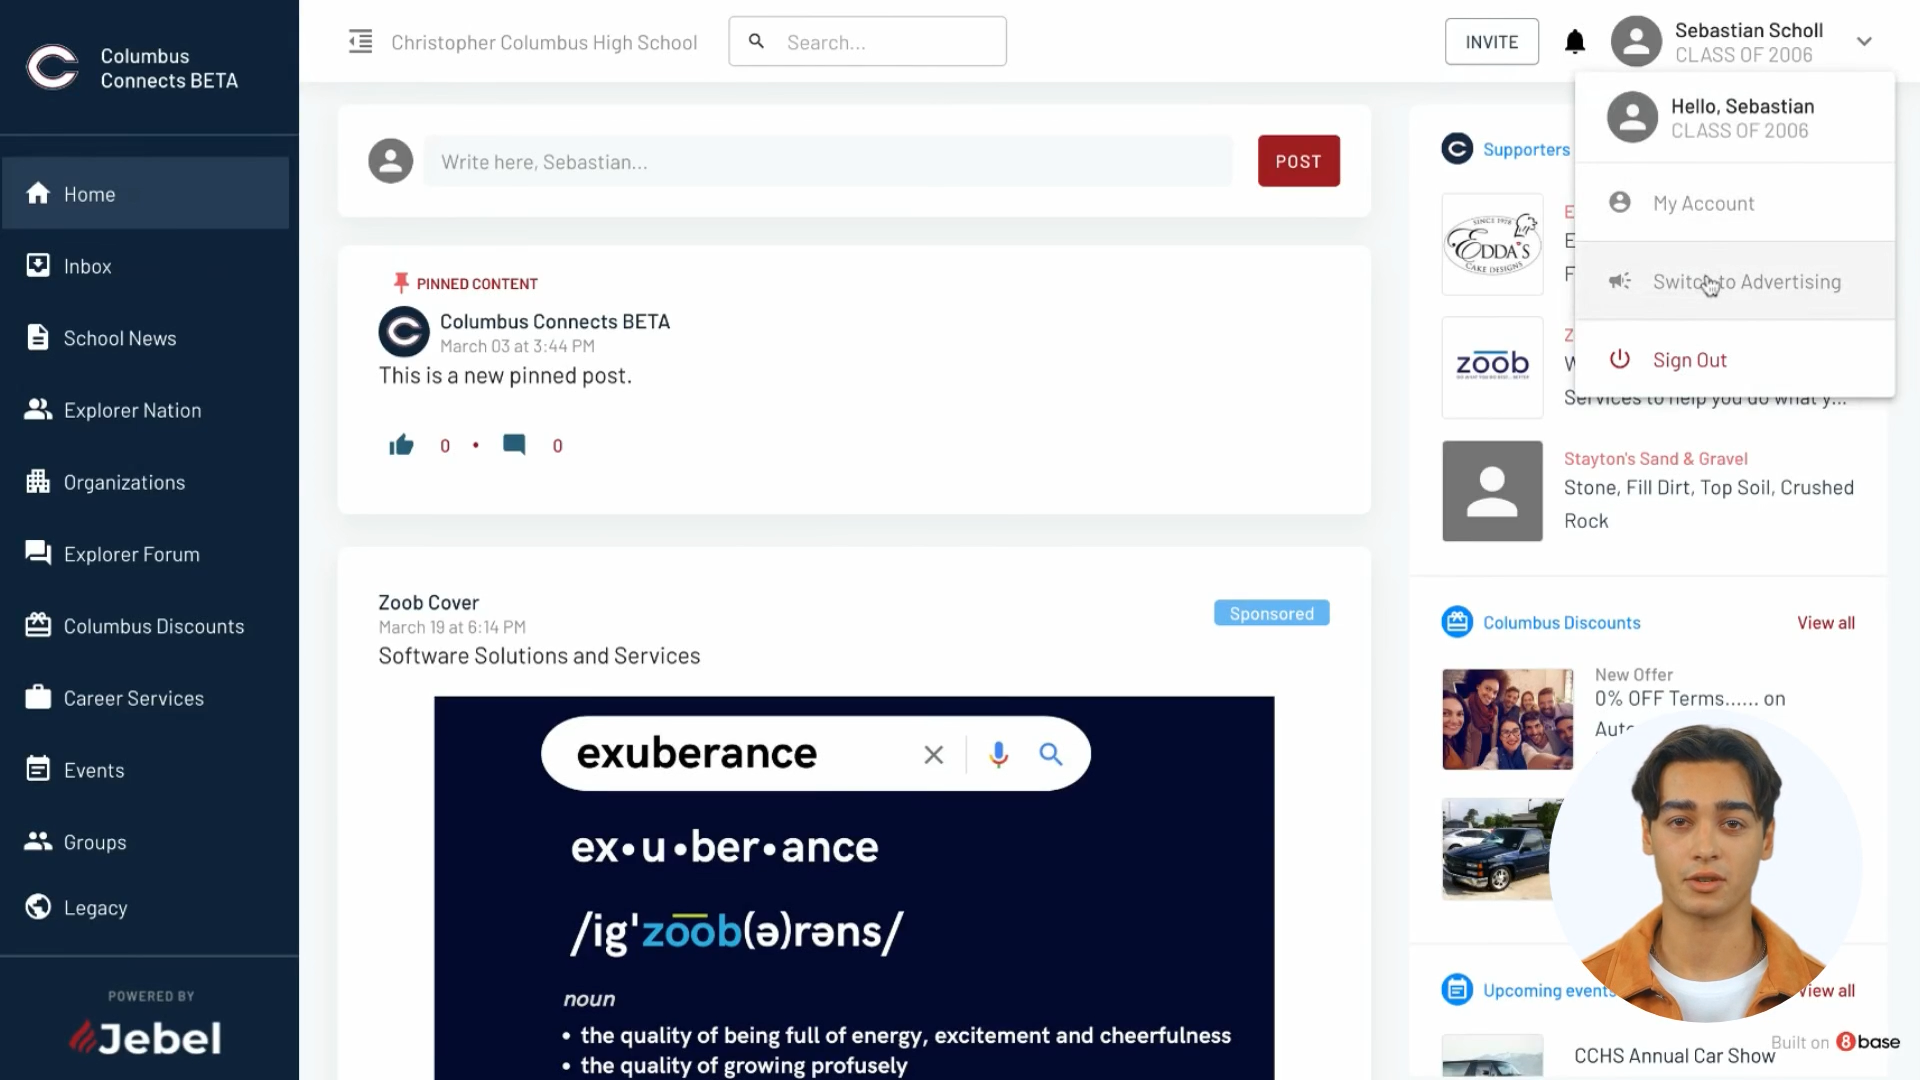
Starting in the Community App, click on the account dropdown menu located in the top right corner of the navigation bar. Here, you'll find an option labeled "Switch to Advertising." This will take you to your Ads Manager.
If it's your first time here, a welcome message and a disclaimer will greet you. Make sure to read and accept any terms before proceeding.
Setting up a Billing Method
Before you can start creating ads, you need to set up a billing method.
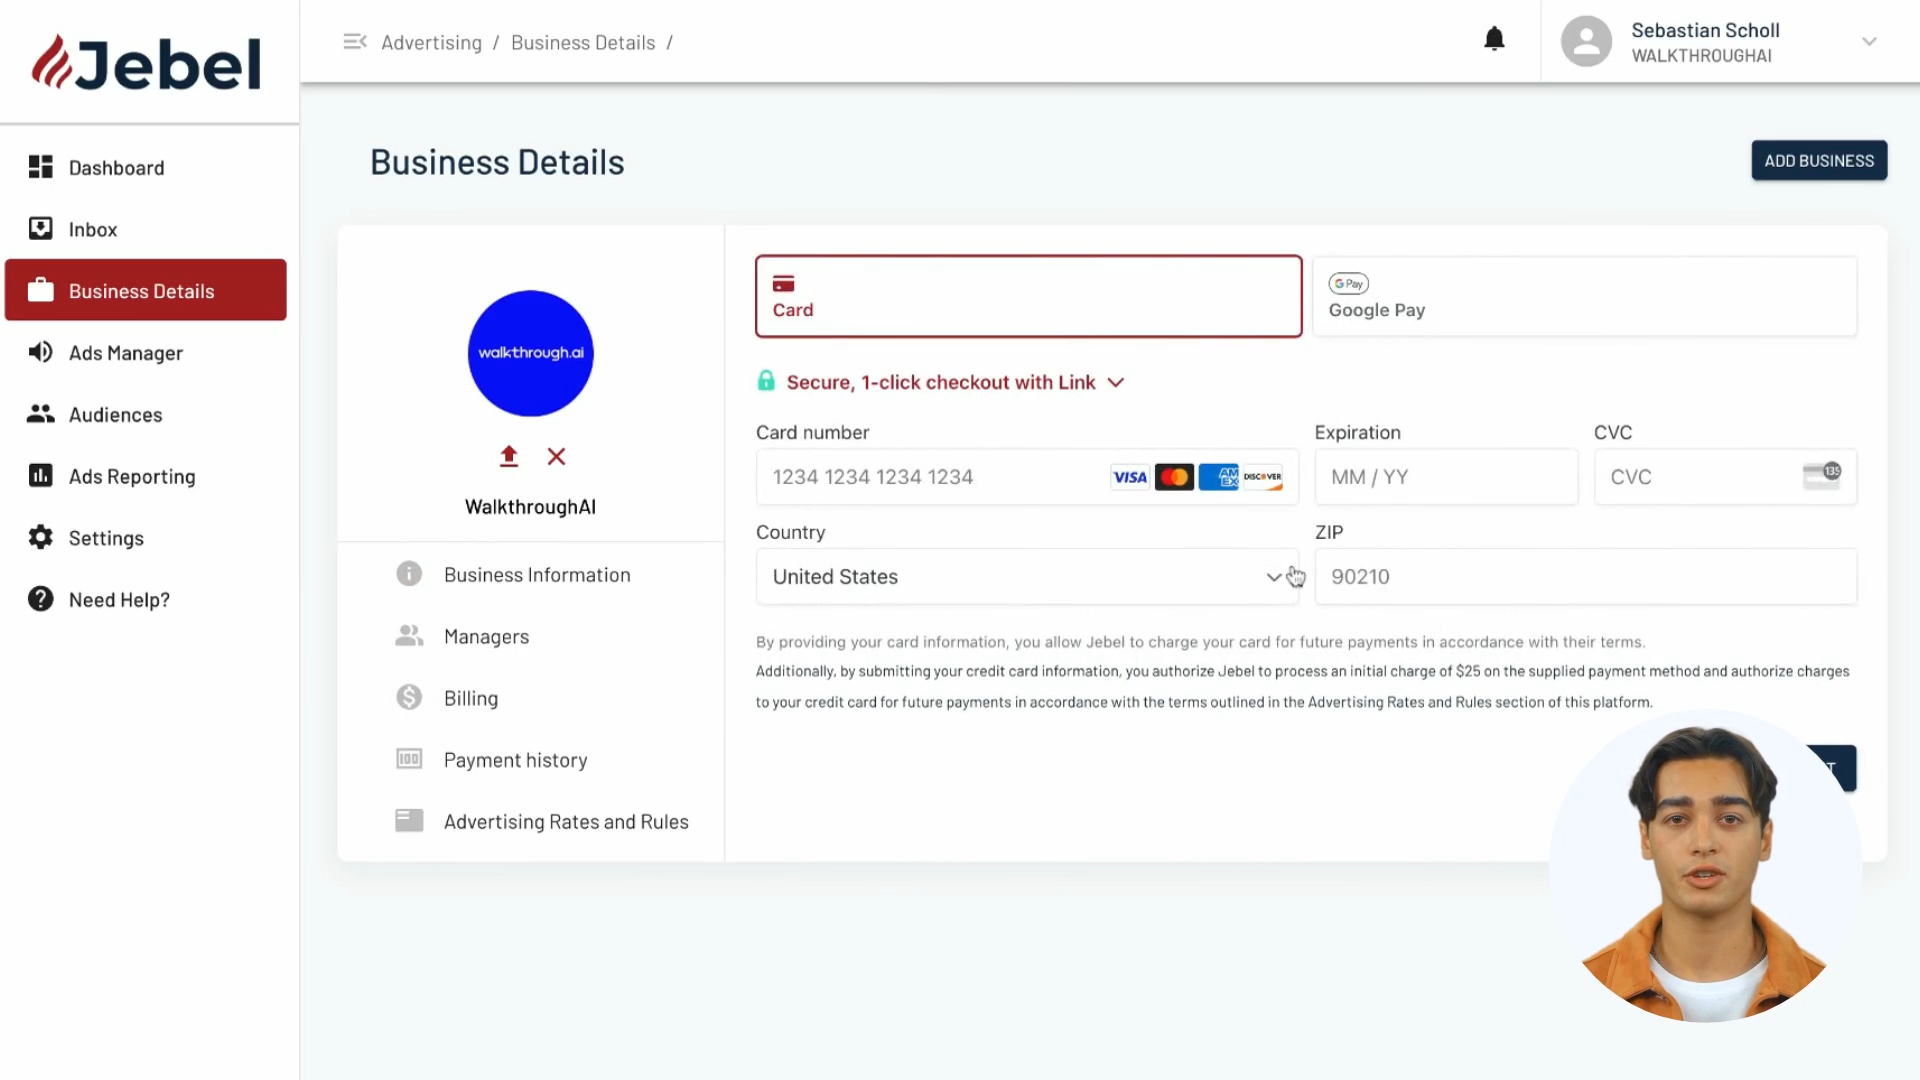
To set up your first billing method, click the "Manage Billing" prompt. Also, you can the billing section through the "Business Details" left menu option.
Enter your card number, expiration date, CVV (Card Verification Value), and other requested billing information. Alternatively, you can link your Google Pay account.
Creating an Ad Campaign
From your advertising dashboard, click on the "Ads Manager" option to in the left menu.
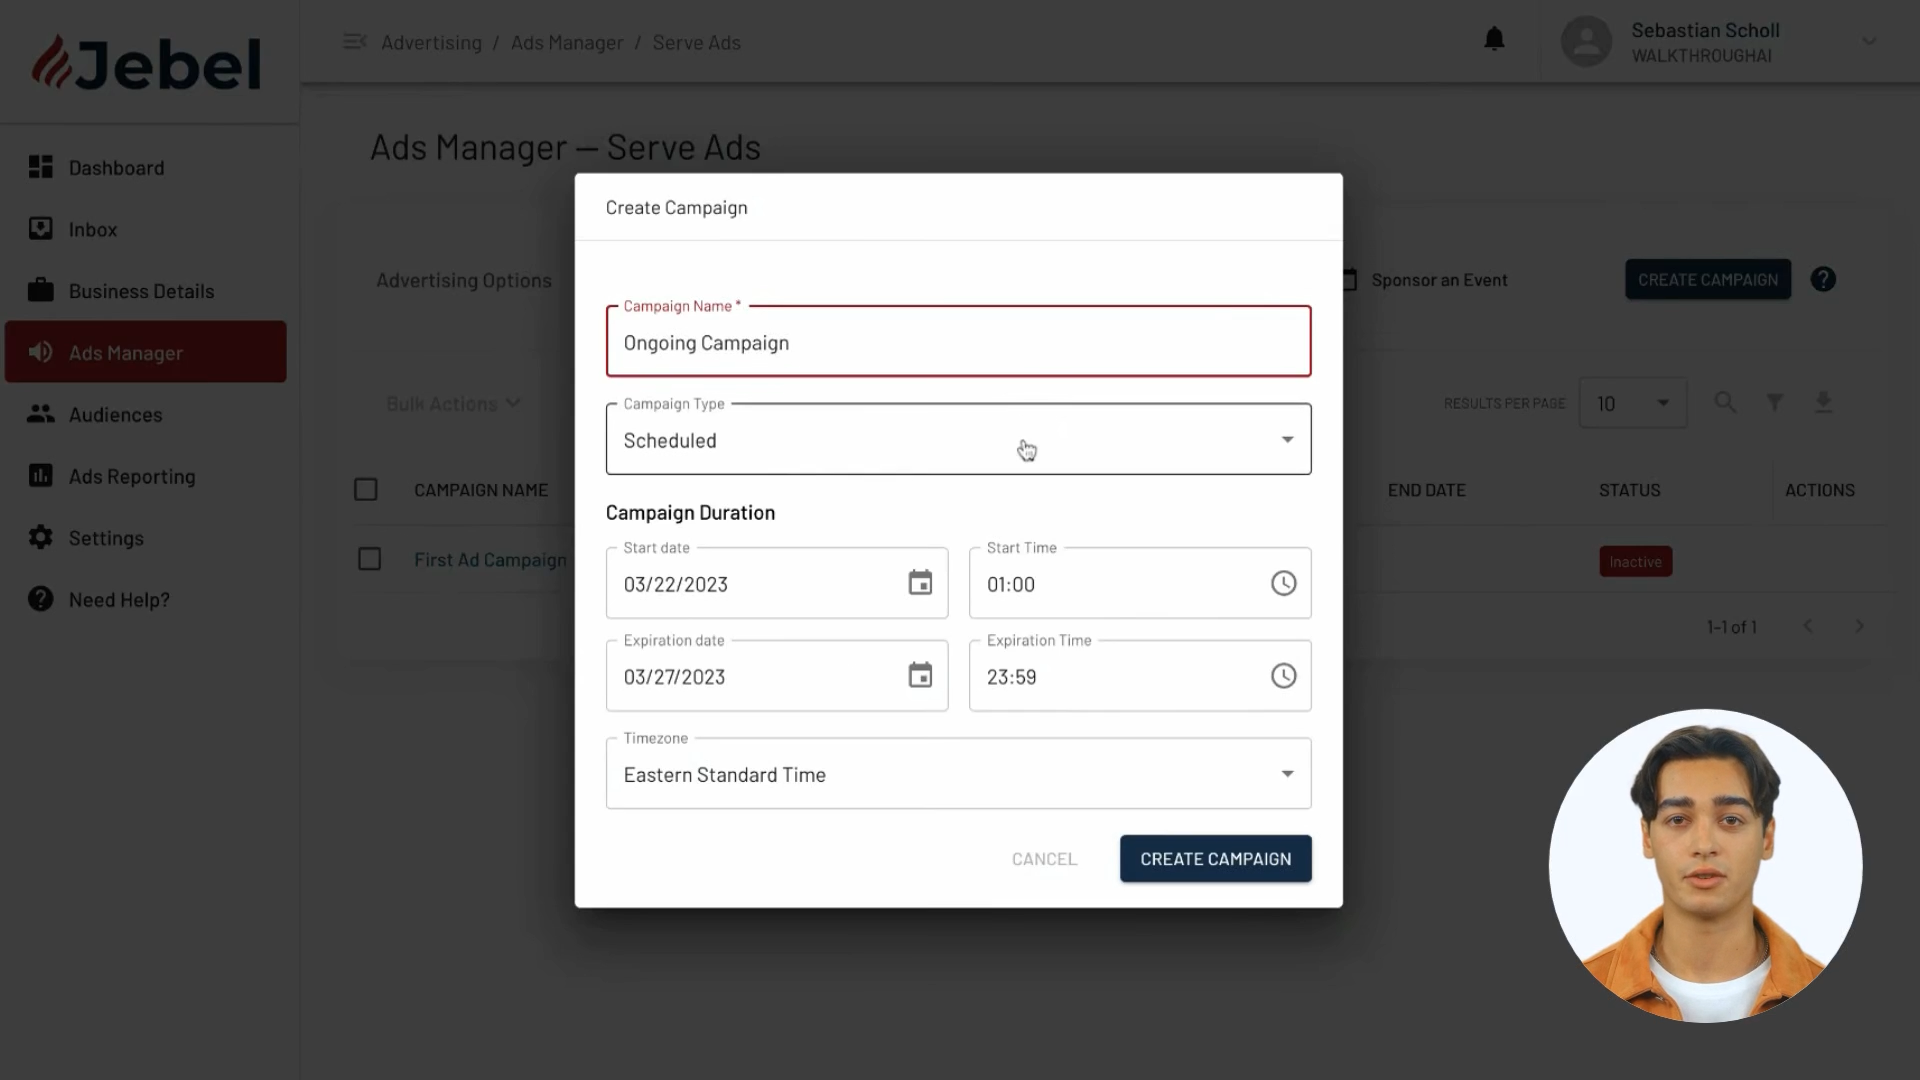
Before creating an ad we need to create a new campaign. A campaign is essentially a container that houses one or more ads and helps with reporting and settings.
Name your campaign and set a Campaigns Type. While "Scheduled" campaigns will run for the duration you set, "Ongoing" campaigns run indefinitely.
Creating an Ad
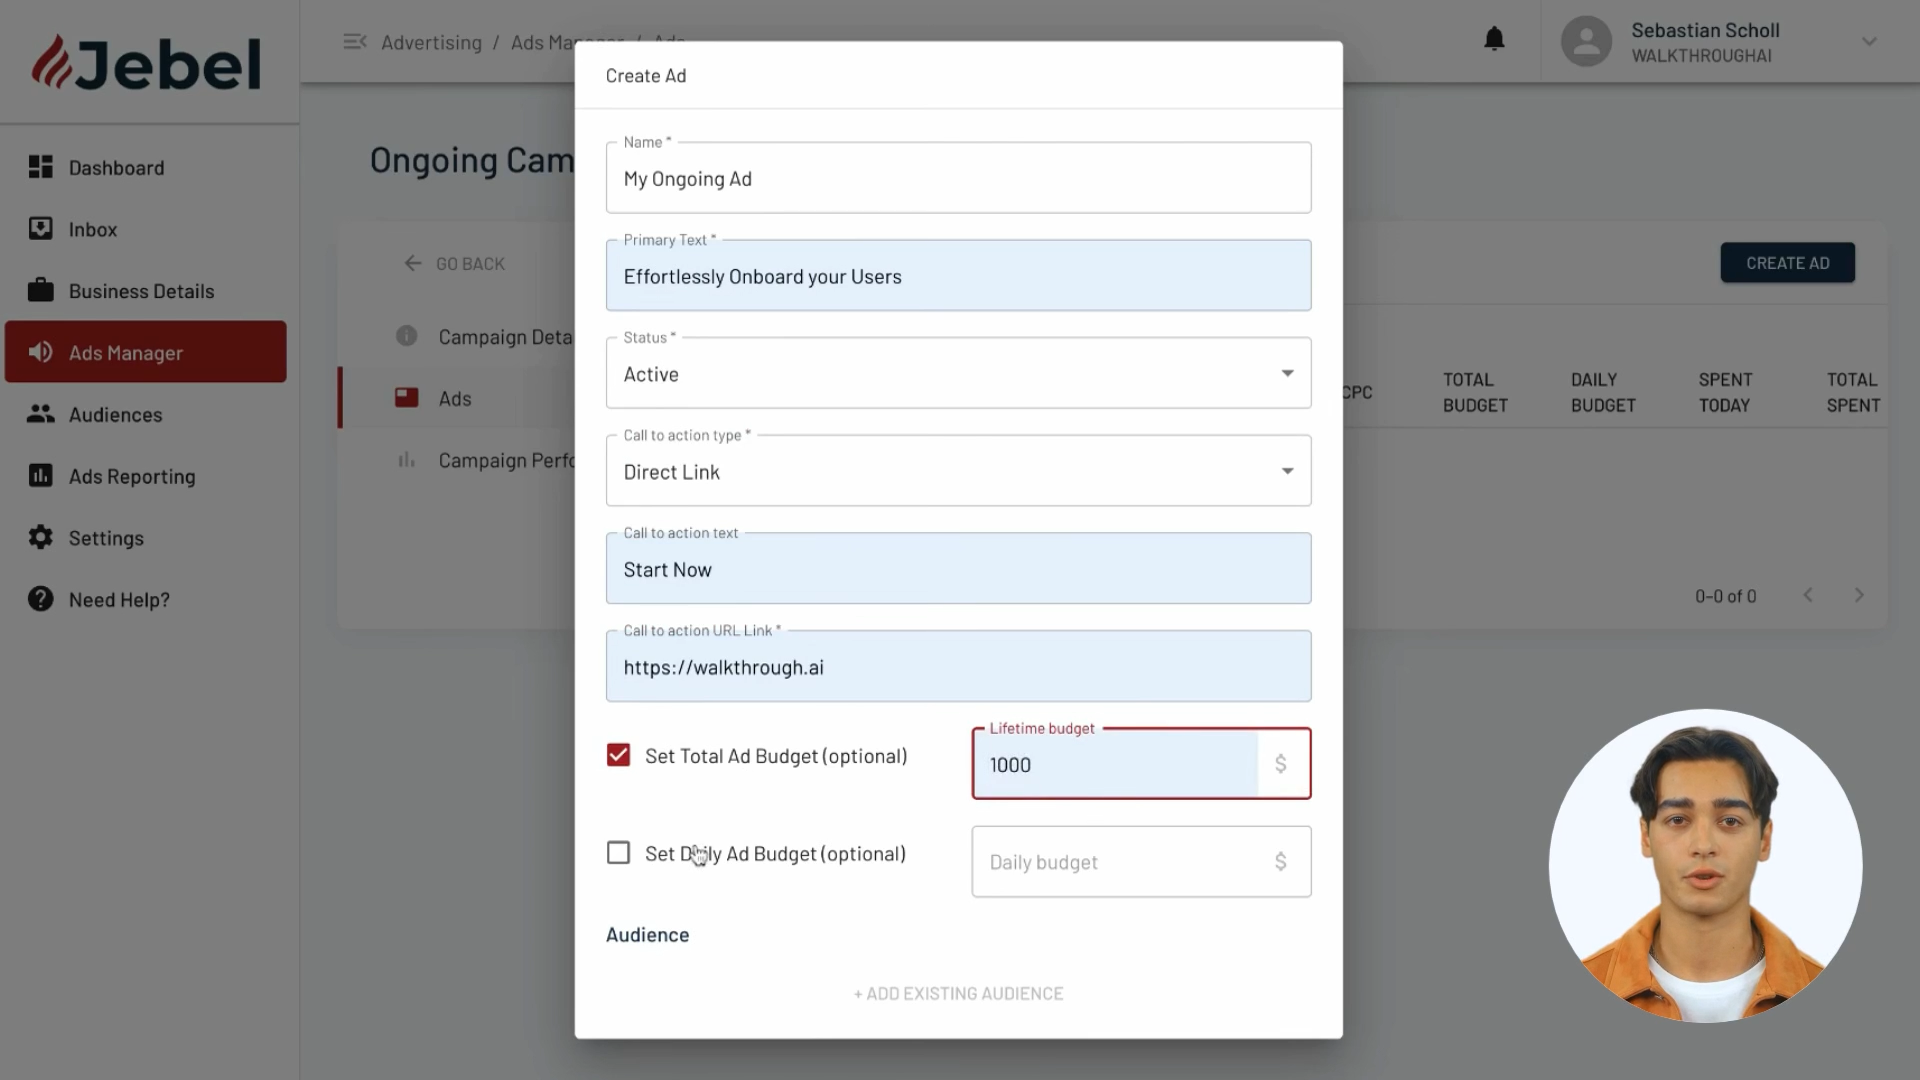
Now that you have a campaign, you can create your first ad! Click the "Create Ad" button in your campaign dashboard.
Provide an internal name, a status (such as active), a call-to-action (CTA), and a CTA URL link. The internal name is a label not visible on the ad itself. The CTA is a direct link accompanied by text, such as "Start Now," "Buy Now," or "Learn More," which is relevant to your product or service. The CTA URL link directs users to a specific web page when they interact with the CTA.
Next, set a lifetime budget (the total amount you're willing to spend) and a daily budget for the ad. Optionally, you can go ahead and specify the target audience demographics and create an ad schedule to define specific time windows during the week when you want the advertisement to run. However, we'll cover these options in future videos and content.
After setting your preferences, upload media for your ad, such as images or videos, which serve as the ad creative. Then, Jebel will show you the "cost per impression", which is the amount you'll pay each time your ad is displayed.
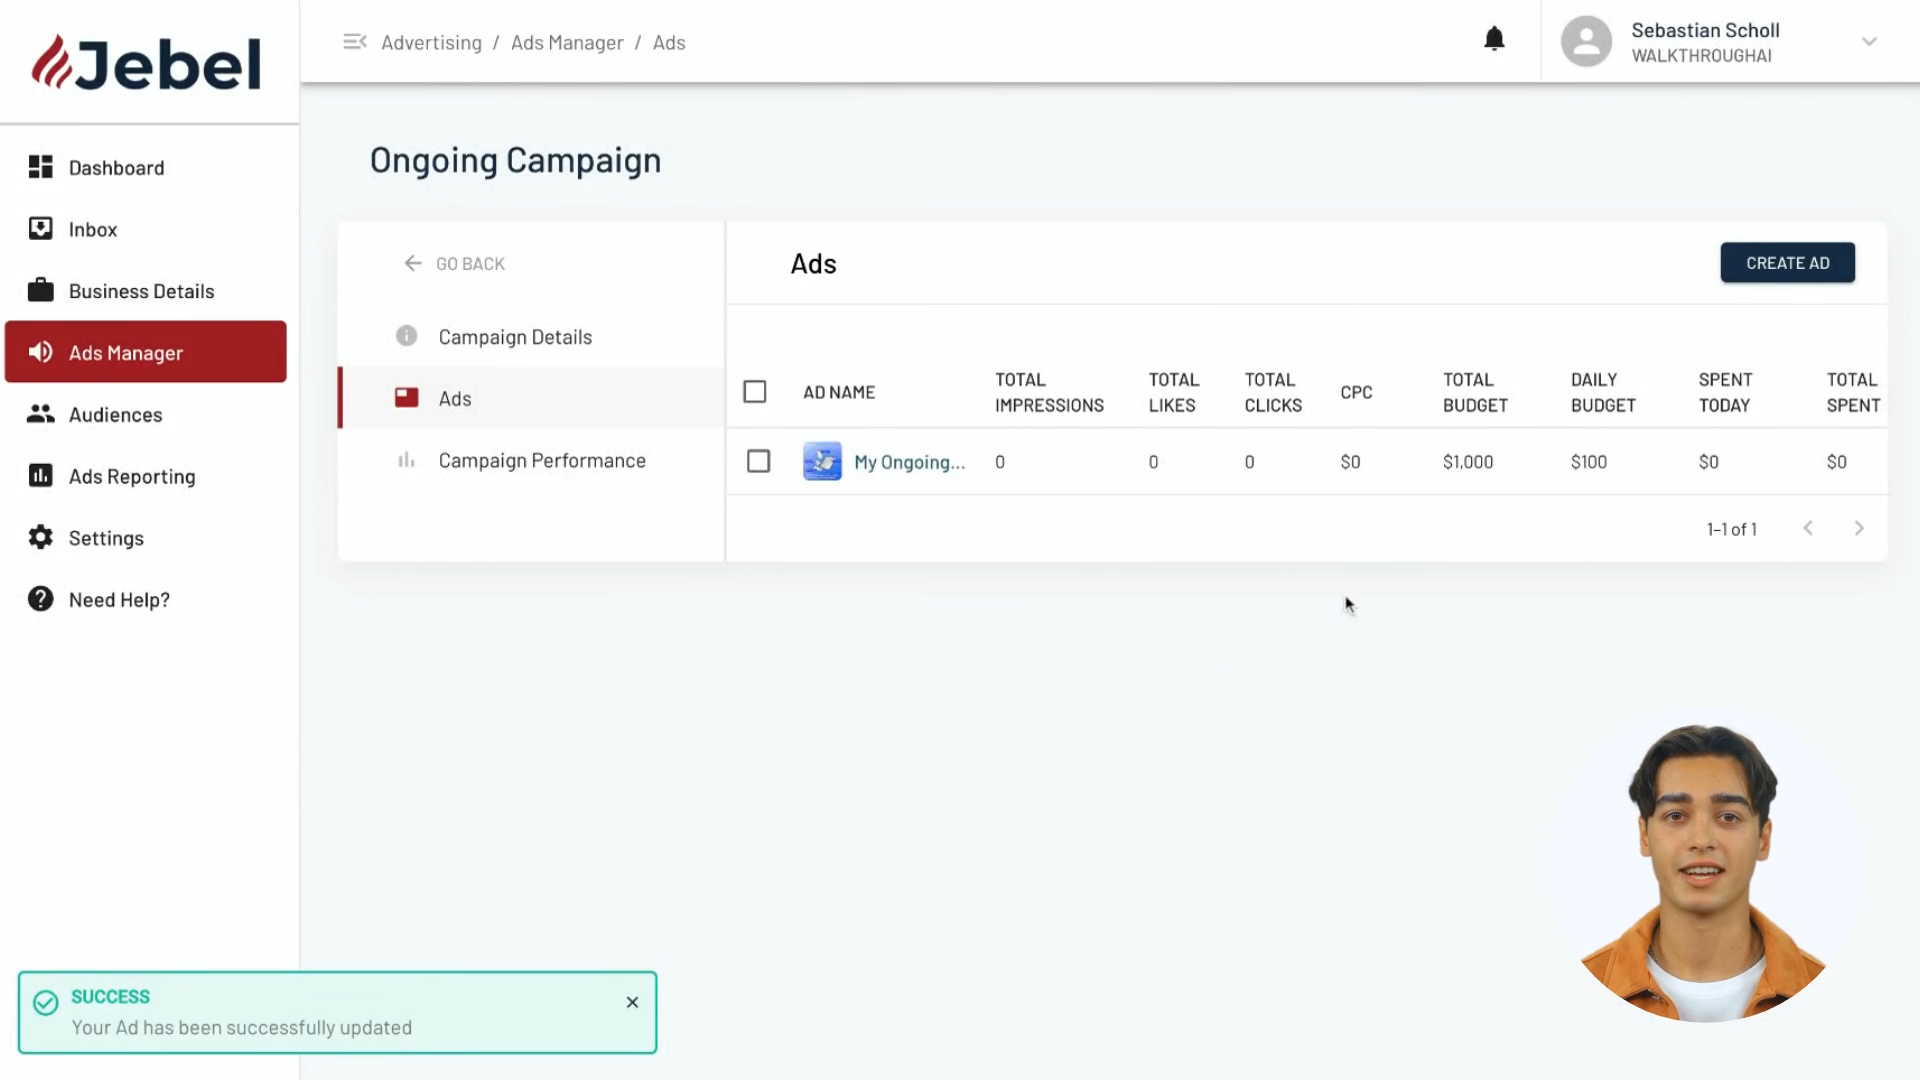
Once you've finished these steps, create the ad. Your advertisement will now go live and be served to your community and any specified audiences!
Viewing the Ad
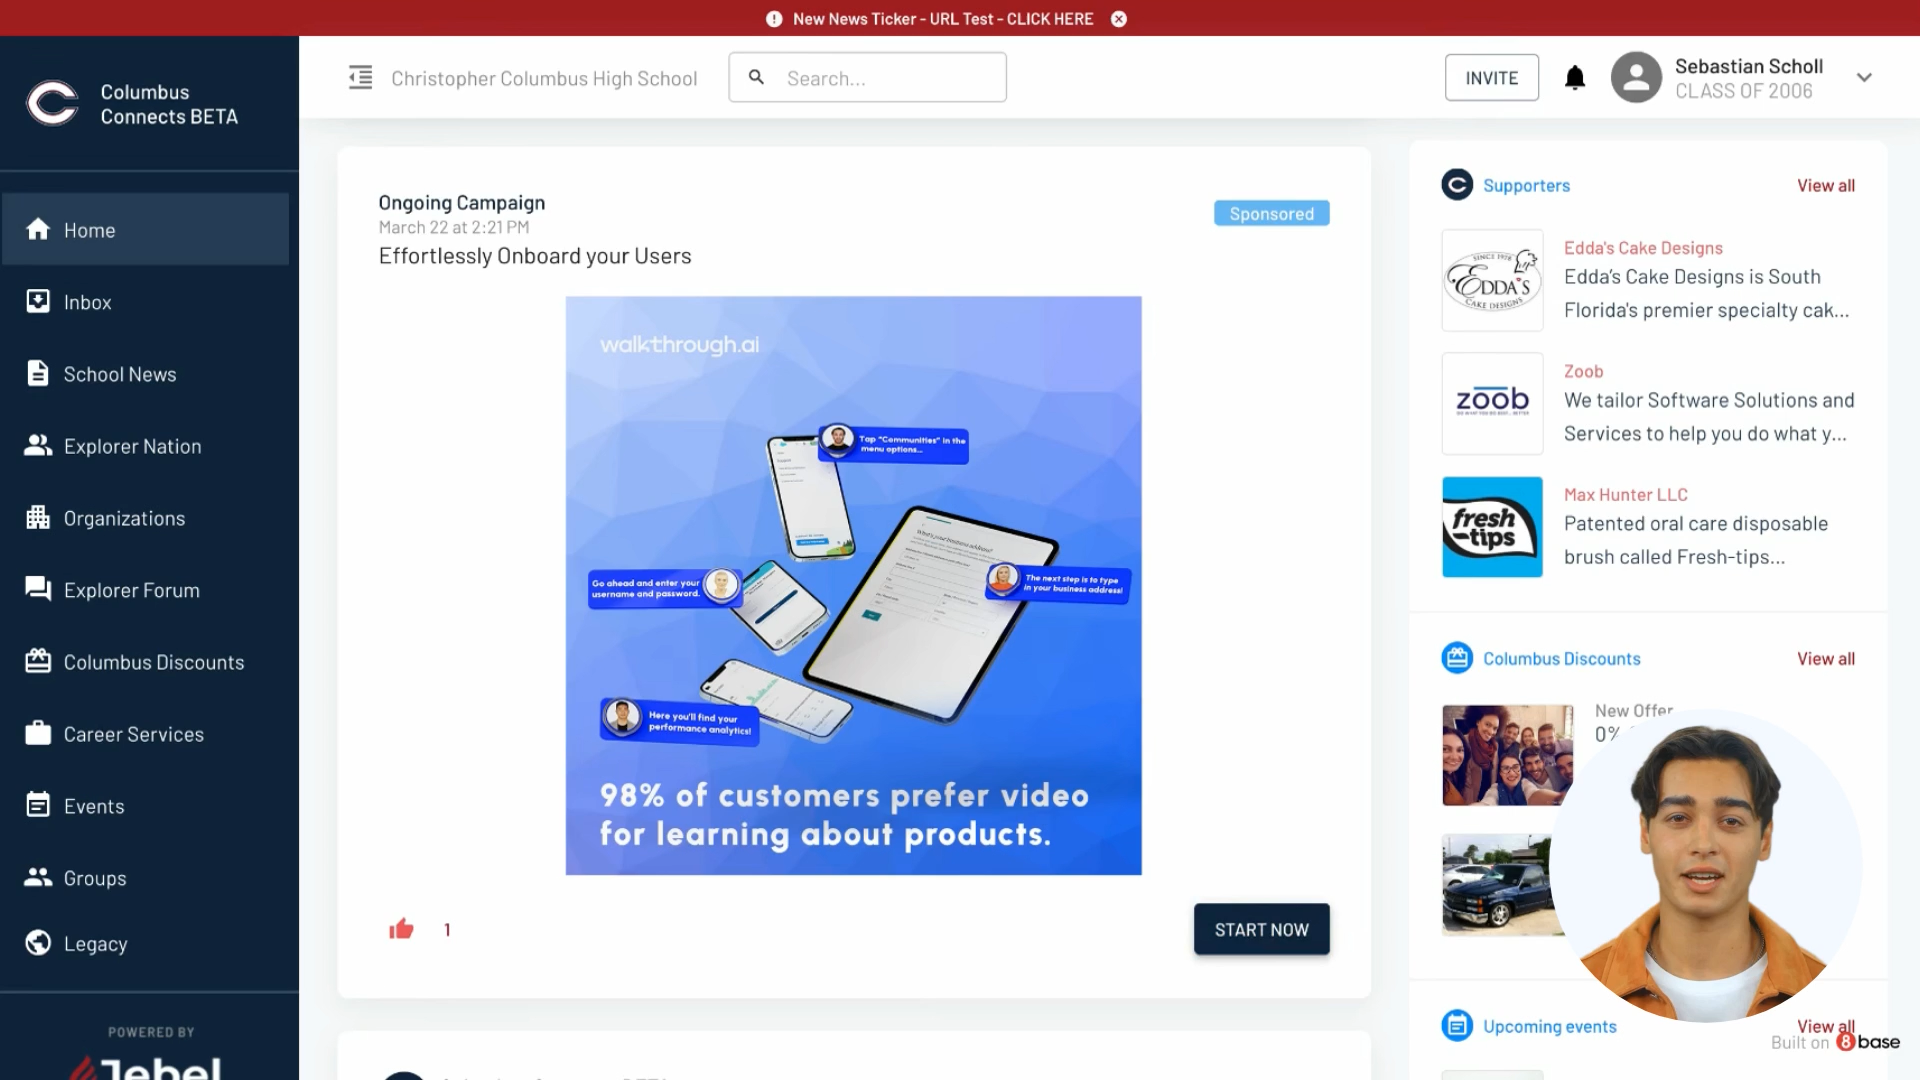
To view your ad running live, you can return to the Community App.
In the app's feed, you'll see your advertisement as a sponsored post, with the CTA linking to your specified URL.
Conclusion
With this guide, you should now have a solid understanding of how to create and launch ads in your Jebel community. This process will enable you to effectively promote your products and services to your target audience.
We'll dive into further detail and topics in future videos and articles!
Comments